
Configuring the output destination for a PrinterOn printer
Now that you’re logged in to the Configuration Manager, you can do some basic configuration so that you can print to a physical printer.
The PrinterOn solution acts as middleware between the user and a physical printer. Essentially, it links a PrinterOn printer definition (which the user selects as their target printer) with a physical printer or print queue, referred to as an output destination (which prints the document).
You can configure the printer definition to point to any physical printer, provided you have the connection information—and the permission—to access it.
When you first install PrinterOn, by default, the installer creates several default PrinterOn printer definitions. However, these definitions do not point to a physical printer; they simply map to a default printer port (for example, LPT1). Before you can print, you need to map a printer definition to its output destination.
At this point, setting the output destination is the only configuration you need to perform. You can define other properties for the printer, such as the name displayed to users, the printer location information, and printer capabilities, at a later time. For more information, refer to the PrinterOn Configuration Guide.
📘 Instructions
To set the output destination for a PrinterOn printer:
In the PrinterOn Configuration Manager, click Printers. The list of PrinterOn Printers appears.
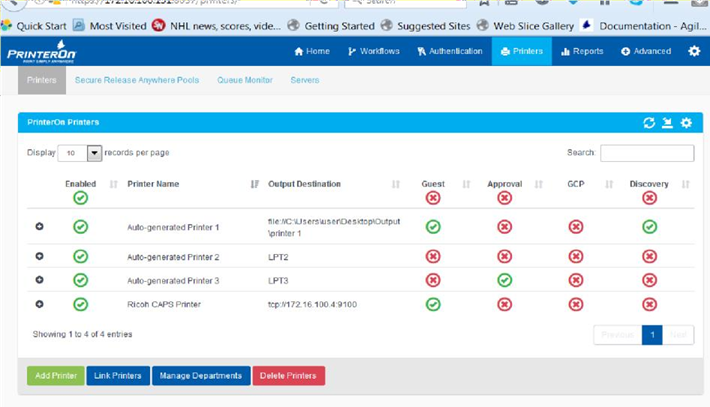
When you launch the Configuration Manager for the first time, the Printers list contains a list of default printer definitions. Printer Name is the name used to identify the printer in the PrinterOn Directory and is the name users see when they choose a printer.
For a thorough description of the information in the Printers list, refer to the PrinterOn Configuration Guide.
In the Printers list, click next to Auto-generated Printer 1. The printer actions appear.

Click Configure. The Printer Configuration dialog appears.
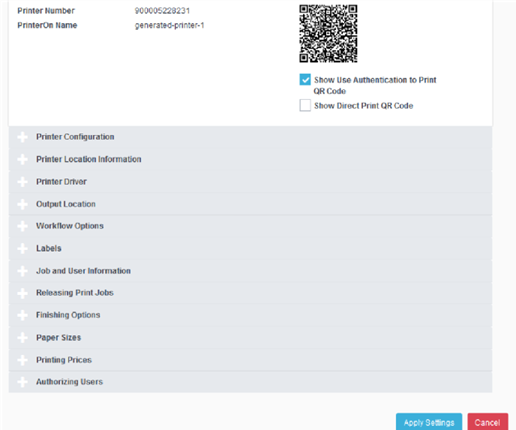
Expand the Output Location panel.
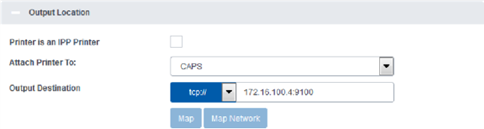
Note the Output Destination field. This field lets you define the address of the physical printer associated with this PrinterOn printer definition.
In the Output Destination field, specify the Output Destination value:
Select a scheme from the drop-down.
Manually enter the printer name or address in the field.
The value you set here depends on how you access your printers in your organization. The following table outlines a few common ways you might set the output destination. For a complete list, refer to the PrinterOn Configuration Guide.
If your printer... | Then use this scheme: | And define the destination as follows: | Examples |
Connects directly to this computer | local:// | Enter the printer name in the text field. | local://Samsung X3186 local://HP LaserJet 4000 Series |
Can be reached directly by its IP address | tcp:// | Enter the IP address and optionally, the port. | tcp://172.16.1.1:9100 |
Supports the IPP protocol | ipp:// | Enter the IP address or URI of the printer followed by the printer queue. | ipp://172.16.1.1/ipp/ port1 |
Click Apply Settings.
You have now associated a physical printer with the printer definition. Next, you can confirm that you can successfully print to the printer.